Installing Bonobo Git Server under Windows 7 with HTTPS and Windows authentication (user side)

This post is the second part (and final) about how to install Bonobo Git Server under Windows 7 over HTTPS with Windows authentication. In this post I will explain how to connect and download a project as user. As prerequisite, you need an already installed and configured Git server, see my previous post.

Create your user at the server and check permissions

  1. Open your web browser and type:
    https://<server_ip>/Bonobo.Git.Server.Interface

    1. As explained when installing the server, the Git server uses a self-signed certificate for secure transfer protocol (HTTPS) that can not be validated. This kind of certificates are ONLY acceptable for intranet pourposes (never for public servers). Your web browser will show an error screen about not being able to validate the identity of the SSL certificate owner (that is the Git server administrator). You must add a permanent exception to access the Git server web page.
    2. You will be prompted to enter your user and password. Use your windows domain user and password:
      User: <your_domain>\<your_user>
      Pass: <your_user_password>
  2. Once you are logged in for the first time, nothing will be available to your user. The reason is that you do not have any permissions, associated repositories or groups. The administrator of the Git server has to set up your account. However, this test has three objectives. First, you have checked the availability of the server to your computer. Second, this first log in has created you account. Finally, if you click on your user name (top right corner), you can edit your user information. You should take a few seconds to enter valid information: real name and surname, and your e-mail account, since this data will be used to store your credentials while pushing to repositories.

Install Git

  1. Download (and install) the latest version of Git at:
    http://git-scm.com/download/win

    1. Click next on every screen. If you don’t want to pollute your context menu, be sure to uncheck “Windows Explorer Integration” at the program features screen.
    2. If you are really brave ;), use the Git Bash console to work with the repositories. Otherwise, install a user-friendly GUI client as explained below. I usually use both, each one has its own advantages and disadvantages.

Install a Git Client with graphical user interface

There are several Git clients with GUI, see here. I recommend you to use SmartGit/Hg for non-commercial projects, because it is free, frequently updated, and plenty of features.

  1. Install the Java Runtime Environment 8 update 25 (or higher). You can download it from here. I recommend to install both x86 (32 bits) and x64 (64 bits) versions under a 64 bits Windows operative system.
  2. Download SmartGit. Choose the “Installer without JRE”, since you have already installed Java in the previous step.

Creating the folder for cloning a repository

  1. As explained before in step 1, the Git server uses a self-signed certificate. SmartGit or any other client will complain about not being able to validate the identity of the server. Therefore, it is mandatory to disable SSL validation for each new repository manually. A bare “git clone” command will not work.
    Solution:

    1. Create a new directory called <project_name> anywhere on your hard drive. The repository will be cloned inside.
    2. Create a file named “gitclone.sh”. Edit the file and copy the code at the end of of this post. Copy “gitclone.sh” to the previously created folder.
    3. Open Git Bash and browse to that folder (with linux-like commands ‘cd’ and ‘ls’). If you selected during the installation shell integration, right-Click on the new directory and select “Git Bash Here”.
    4. Once Git Bash is inside the folder, type in the terminal:
      gitclone <project_name> <your_domain_user_name>
      and hit enter.
  2. In SmartGit, open the existing local repository (Repository -> Add or Create), and click the Pull button.
  3. If you are able to successfully open the project an pull the repository, remove the “gitclone.sh” file, which is no longer needed.
  4. Always use your Windows credentials (user and password), following username scheme: DOMAIN\<username> for pulling and pushing to the server.

Resources

It is advisable to take a look at some online tutorials to grasp the surface of what can be done with Git. You may start with these ones:

gitclone.sh


#!/bin/sh

function usage
{
echo -e "usage:\t\tgitclone <git_project_name> <your_windows_login_username>"
echo -e "example:\tgitclone MyProject xmellado"
exit
}

if [ $# -eq 0 ]; then
echo "Your command line does not contain arguments. Two arguments are expected."
usage
elif [ $# -eq 1 ]; then
echo "Your command line contains $# argument. Two arguments are expected."
usage
elif [ $# -gt 2 ]; then
echo "Your command line contains $# arguments. Only two arguments are expected."
usage
fi

GIT_PROJECT_NAME=$1
GIT_USER_NAME=$2

echo "Initializing empty Git repository"
git init
echo "Disabling SSL verification since the Git server uses a self-signed certificate"
git config http.sslVerify false
echo "Adding the remote server"
git remote add origin https://<your_domain>\\$GIT_USER_NAME@<server_IP>/Bonobo.Git.Server/$GIT_PROJECT_NAME.git
echo "Increasing buffer size for large transfer operations (maximum 512 MB)"
git config http.postBuffer 524288000
echo "Pulling files from remote server"
git pull origin master
echo "Set local master branch to track origin/master branch"
git branch -u origin/master

 

Installing Bonobo Git Server under Windows 7 with HTTPS and Windows authentication (server side)

If you have at work, or at home, a Windows domain and you want to install your own Git server, Bonobo Git Server may be your choice, since it is easy to install, configure and administrate. I chose this Git server implementation at work, because it allowed us to use our Windows domain users and passwords without the need for creating new ones specially for the source control management tool.

Bonobo Git Server has a decent documentation, FAQ, and forum to help you while installing this software. I will include some steps from the installation guide, from the FAQ and I will add a few new steps for using HTTPS as communication protocol. Let’s start:

  1. Get the Bonobo Git Server from its website.
  2. Go to the installation guide and make sure that you have all the prerequisites properly installed and configured. In this case under Windows 7:
    1. Install IIS 7 on Windows Vista and Windows 7. When installing IIS7, leave the default options.
    2. .NET Framework 4.5. Install it using Windows Update.
    3. ASP.NET MVC 4. Install it using the standalone installer and don’t forget to register MVC framework with your IIS as explained in the prerequisite webpage:
      1. Windows 7. Following the same procedure that you used to install IIS 7, add the ASP.NET feature. IIS -> WWWS -> Application Development Features -> ASP.NET 4.5.
      2. Run from the command line with administrator privileges “%windir%\Microsoft.NET\Framework\v4.0.30319\aspnet_regiis.exe -ir”.
  3. Now, install Bonobo Git Server following its instructions.
    1. To open IIS Manager, click Start, type “inetmgr” in the Search Programs and Files box, and then press ENTER.
    2. When converting the Bonobo Git Server into and application select as application pool: ASP.NET 4.0.
  4. Restart the computer and check that http://localhost/Bonobo.Git.Server is accessible.
  5. Now follow the Bonobo Git Server Windows Authentication instructions.
    1. In order to complete the section “How to configure IIS?”. Enable Windows and basic authentication. The complete path for Windows 7 and 8 is:
      Control panel
      Programs and Features
      Turn Windows Features on or off
      Expand: Internet Information Services => World Wide Web Services => Security
      Select “Basic Authentication”
      Select “Windows Authentication”
    2. Restart the computer.
    3. Follow the “How to configure IIS?” instructions.
    4. Test the interface website works with HTTP.
  6. If the webpage does not show images, follow the FAQ answers for “Bonobo Git Server doesn’t server CSS”.
  7. Once the first user, which will be the administrator, is logged in at the interface webpage, set:
    <add key=”ShouldImportWindowsUserAsAdministrator” value=”false” />
    in both, server and interface, to avoid that any new user will gain administrator privileges.
  8. If you want to secure your connection with HTTPS:
    1. Go to the ISS Manager and create a SSL certificate as explained in How to Set Up SSL on IIS 7  The Official Microsoft IIS Site. Section “IIS Manager” -> “Obtain a Certificate”.
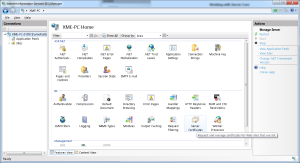
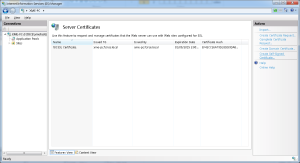
      1. Launch “Internet Information Services (IIS) Manager” (execute inetmgr) -> Select the Server field -> Server Certificates.
        https_001
      2. Create Self-Signed Certificate. Use a descriptive name like “Git SSL certificate”.
        https_002
    2. Create an SSL Binding:
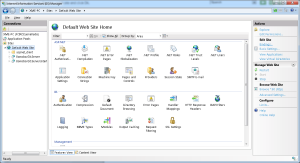
      1. Select the “Default Web Site” and click on “Bindings”.
        https_003
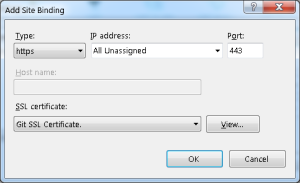
      2. Select “https” and your self-signed certificate at the bottom of the dialog.
        https_004
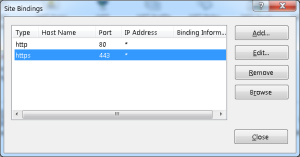
      3. The result should look like this:
        https_005
    3. Require SSL for the Bonobo Git applications.
      1. Select the Bonobo Git Server application in IIS7.
        https_006
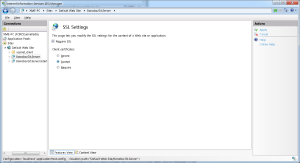
      2. Click on SSL Certificates, requiere SSL and accept client certificates.
        https_007
      3. Click on apply (top right corner).
      4. Do the same for the Bonobo Git Interface application.
    4. Restart and you should be able to access the main Bonobo Git webpage with HTTP and HTTPS.
  9. Self-signed certificates can not be validated and are ONLY acceptable for intranet purposes (never for public servers, since man in the middle attacks may happen). Git bash or any other client will complain (for example, see SmartGit SSL Certificate Problem). The solution is to disable SSL validation for each new repository manually. I know, it is a bit painful.
    1. Create a new directory called <project_name>
    2. Open Git Bash and browse to that folder or right-Click on the new directory and select “Git Bash Here”.
    3. Enter the following command lines:
      git init
      git config http.sslVerify false
      git remote add origin https://<server_IP_address>/Bonobo.Git.Server/<git_project_name&gt;.git
      git config http.postBuffer 524288000 (see point 10)
      Alternatively, you can use a small script to make this process faster,  a bit better, and easier. Please, take a look at the user side post.
  10. To avoid crashes while making “big” pushes. Execute:
    git config http.postBuffer 524288000
    at the client side folder with Git Bash.  See Bonobo Git Server FAQ. Apply all the changes in the section Cloning Error – RPC failed.
  11. For uploading and downloading big chunks of data over SSL, you need to change (increase) your “uploadReadAheadSize”:
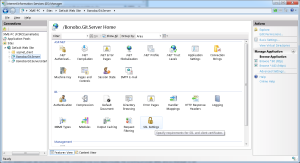
    1. Launch “Internet Information Services (IIS) Manager” (execute inetmgr)
    2. Expand the Server field -> Expand Sites -> Select the site you want to make the modification for (Bonobo.Git.Server).
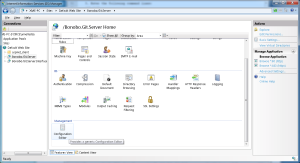
    3. In the Features section, double click “Configuration Editor”
      snap008
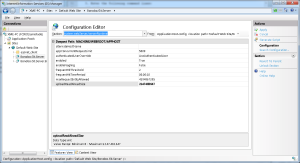
    4. Under “Section” select: system.webServer/serverRuntime
    5. Modify the “uploadReadAheadSize” section (“The value must be between 0 and 2147483647.”). Set it to 2147483647 (2GB).
      snap009
    6. Click Apply and restart the web site.
  12. Finally, it is mandatory to open the HTTPS port (443) in the windows firewall for allowing the connection of other computers to the Git Server. Open the Control Panel -> System and Security -> Windows Firewall, click Allow a program or feature through Windows Firewall and scroll down to “Secure World Wide Web services (HTTPS)” and check Domain and/or Home network (the most restrictive that works).
  13. Under Windows 7, there is a bug in IIS7 regarding SSL. Install Windows 7 patch KB2634328, or you will not be able to push/pull big files over HTTPS. See Bonobo Git Server FAQ.

    Optional:
  14. Change repository location. As a general policy, I always save data in other partition than “C:”. Go to the Bonobo Git Server Interface, login and click on settings.
    1. Change the repository location.
    2. Make sure ISS_ISURS have read/write/modify access to the new folder. See Bonobo Git Server FAQ.
  15. If you have old repositories, place them inside the repository directory and restart the Git server. They will be discovered next time the application starts.

    Other problems:
  16. When login with your Windows user, it may not work. Try to access the web interface with your credentials. If you are successful, use them to push and clone. If the credentials don’t work, try the following username scheme: DOMAIN\username or username@DOMAIN, and note that DOMAIN is not the name of your git server instance, but your intranet/Windows/ActiveDirectory domain. See Ad Authentication and Push.

The application was unable to start correctly (or failed to initialize properly)

When one of the following error messages is shown after executing an application:

  • The application was unable to start correctly (0xc<7 hexadecinal digits>). Click OK to terminate the application.
  • The application failed to initialize properly (0xc<7 hexadecinal digits>). Click OK to terminate the application.

there is no information about what is the real problem. It may get more mystic if you are developing the application. You will try to debug it without success, since the same error will appear in Visual Studio, or any other IDE, and the first line of code in your main function is not reached. The application really can’t start.

This error usually means that a shared library (dll) is missing. If the missing shared library is a direct (first level) dependency, the error is different and informative (The program can’t start because XXXXXX.dll is missing from your computer). However, if a shared library calls another shared library, the former and obscure error will be displayed instead.

The solution: download the Dependency Walker application, and run it with your application executable to find the missing shared library file name. Once you know the file name, google it, find and download the prerequisite that contains the library, and install it.

Take into account that:

  1. The shared library version matters. If you install a different prerequisite version than the one originally used for compiling the calling shared library, the error may be still thrown. Therefore, you may try more than one version until you find the right one.
  2. Do not download single dll files from untrusted sites, since there is no guarantee that those files are untouched.

Real case scenario: your application uses some third-party shared libraries as black boxes (you don’t have the source code). Someone updates one of these third-party libraries at the common repository, and the updated library has a new dependency. When you update your local copy, compile and execute, you will find the error.

P.S.: In Spanish, the errors are translated as “La aplicación no se ha podido inicializar correctamente (0xc<7 dígitos hexadecimales>)” and “El programa no puede iniciarse porque falta XXXXXX.dll en el equipo”.

Fresh installation of Windows XP 32 bits with Service Pack 3 and the Windows Update nightmare

Update (2014/01/15): It seems that Microsoft has fixed the update service problem and these steps are no longer needed.

If you have recently (since October of 2013) tried to perform a fresh installation of Windows XP SP3, you may have found that updating Windows, after the final boot, seems to take forever, while one of your CPU cores is 100% busy due to a svchost.exe process at full throttle. This issue has been discussed many times all over Internet, but I found that some solutions did not work for me, and the one that worked was not clearly explained. For the latter reason, I decided to share what I have learned struggling with this problem for two days. Here we go:

  1. You may start reading about this problem in this post.
  2. Windows XP SP3 comes with Internet Explorer (IE) 6, but IE8 and its offline installer is needed for solving the problem. You should check that the installer matches your operative system language.
  3. Perform a fresh Windows XP SP3 installation. When you are asked about automatic updates, disable them. I will assume that a user with administrator privileges is used to perform any of the following steps.
  4. Verify that you are connected to the Internet. If not, install network adapter drivers, and configure your network.
  5. Before you proceed with the installation of IE8: a) enable automatic updates “notify but do not download” option, b) disable the automatic update service. For disabling automatic updates, execute the command line net stop “Automatic Updates” or, alternatively, go to Start -> Control Panel -> Administrative Tools -> Services and disable the automatic update service. Do not restart, or the service will be up and running again.
  6. Run the IE8 installer (“IE8-WindowsXP-x86-ENU.exe” for English language) and check that the download updates option is on. It should take a while to download the updates and install everything. If the automatic update service is running while IE8 is downloading its patches, the problem will arise and it will take forever to install the browser.
  7. Restart.

Hopefully, after all these steps, you will see again the yellow shield in the task bar and you will be able to use the Windows Update service through IE8 without problems.

NOTE: Bear in mind that support for Windows XP ends on April 8, 2014.

Custom compiling of Cryptopp for my project

I want to develop a very simple licensing system. I decided to use Crypto++ v5.6.2 for generating public and private keys, cypher and decipher files. This library is build under Windows with Visual Studio and its solution files, but my project is using CMake for generating these solution files. Therefore, either I can write some CMake files for compiling Crypto++ or I can compile it and move the resulting files to my environment, using CMake to collect and include them in my solution. The latter is the approach that I have chosen with some libraries, since it is usually really difficult to write CMake files for building a library that you have not develop.

These are the steps I followed:

  1. Read Readme.txt at the root folder inside the zip file, and pay attention to the MSVC section. The cryplib project is the full static library project.
  2. I am using Ogre and other projects that force me to use shared C++ run-time libraries. Criptop++ use static C++ run-time libraries by default. As I explained in other posts, make sure that this setting is consistent across all your dependencies. Therefore, go to the cryplib Project Properties -> C/C++ -> Code Generation and switch from Multi-threaded to Multi-threaded DLL, in debug /MTd to /MDd and in release /MT to /MD.
  3. Ogre also uses multi-byte character set, so switch for all configurations General -> Character Set to Use Multi-Byte Character Set.
  4. Make sure Code Generation -> Enable Enhanced Instruction Set is set to /arch:SSE2 in release and debug.
  5. Following the same philosophy than Ogre and other libraries, I will build release and debug libraries with different names, in order to make it easier to add them by hand in my CMake project files. Switch to the debug configuration and find Target Name property at General, change its value to $(ProjectName)_d. It is advisable to rename the *.pdb files with the same name than the target name, so go to C/C++ -> Output files and and change its value to $(OutDir)$(TargetName).pdb.
  6. I will create another configuration for compiling in release mode with debugging information. Click on the Configuration Manager button. Unfold the Active Solution Configuration list, and select <New>. Then, choose in Copy settings from the release configuration, and use the CMake name for this kind of build RelWithDebInfo. Once the new configuration has been created, I recommend to save, close the IDE, and open it again. Now, make sure the release configuration does not include debugging information. C/C++ -> Debug Information Format should be empty, and this property in RelWithDebInfo configuration should be set to Program Database /Zi. Lastly, disable any optimization by setting C/C++ -> Optimization -> Optimization to Disabled (/Od).
  7. I do not want the whole program optimization, because other libraries do not use it, and some warnings or errors may happen when the final linking of my application is done. Hence, go to General -> Whole Program Optimization and set No Whole Program Optimization in release and RelWithDebInfo configurations. Besides, in Librarian -> Link Time Code Generation set it to No. Deactivation of /LTGC optimization flag must be done in both places, when compiling and when linking.

Finally, you are ready to compile and include the final results in your project. I created a new folder called Cryptopp with two folders: lib for the binaries and include for the header files. In my CMake files, ExternalDependencies.cmake contains the path to the include and binary folders, and the name of the libraries for the debug and release configurations, such as:

SET(EXTERNAL_DEPENDENCIES_DIR “${CMAKE_CURRENT_SOURCE_DIR}/Source/External”)

SET(EXTERNAL_DEPENDENCIES_INCLUDE_DIRS
“${EXTERNAL_DEPENDENCIES_DIR}/Boost”
“${EXTERNAL_DEPENDENCIES_DIR}/Ogre/include/OGRE”
“${EXTERNAL_DEPENDENCIES_DIR}/Ogre/include/OIS”
“${EXTERNAL_DEPENDENCIES_DIR}/Bullet/src”
“${EXTERNAL_DEPENDENCIES_DIR}/CEGUI/include”
“${EXTERNAL_DEPENDENCIES_DIR}/OpenNI/include”
“${EXTERNAL_DEPENDENCIES_DIR}/PrimeSense_NITE/include”
“${EXTERNAL_DEPENDENCIES_DIR}/Wiiuse/include”
“${EXTERNAL_DEPENDENCIES_DIR}/NatNetClient/include”
“${EXTERNAL_DEPENDENCIES_DIR}/TrackingTools/include”
“${EXTERNAL_DEPENDENCIES_DIR}/irrKlang/include”
“${EXTERNAL_DEPENDENCIES_DIR}/OpenCV/include”
“${EXTERNAL_DEPENDENCIES_DIR}/Cryptopp/include”
)

SET(EXTERNAL_DEPENDENCIES_LIBRARY_DIRS
“${EXTERNAL_DEPENDENCIES_DIR}/Boost/lib”
“${EXTERNAL_DEPENDENCIES_DIR}/Ogre/lib”
“${EXTERNAL_DEPENDENCIES_DIR}/Bullet/lib”
“${EXTERNAL_DEPENDENCIES_DIR}/CEGUI/lib”
“${EXTERNAL_DEPENDENCIES_DIR}/OpenNI/lib”
“${EXTERNAL_DEPENDENCIES_DIR}/PrimeSense_NITE/lib”
“${EXTERNAL_DEPENDENCIES_DIR}/Wiiuse/lib”
“${EXTERNAL_DEPENDENCIES_DIR}/NatNetClient/lib”
“${EXTERNAL_DEPENDENCIES_DIR}/TrackingTools/lib”
“${EXTERNAL_DEPENDENCIES_DIR}/irrKlang/lib/Win32-visualStudio”
“${EXTERNAL_DEPENDENCIES_DIR}/OpenCV/lib”
“${EXTERNAL_DEPENDENCIES_DIR}/Cryptopp/lib”
)

SET(EXTERNAL_DEPENDENCIES_LIBRARIES_DEBUG
ogremain_d
ois_d
LinearMath_Debug
BulletCollision_Debug
BulletDynamics_Debug
irrKlang
CEGUIBase_d
CEGUIOgreRenderer_d
ws2_32
NatNetLibStatic
NPTrackingTools
wiiuse
opencv_core243d
opencv_highgui243d
opencv_imgproc243d
OpenNI
XnVNITE
cryptlib_d
)

SET(EXTERNAL_DEPENDENCIES_LIBRARIES_RELEASE
ogremain
ois
LinearMath
BulletCollision
BulletDynamics
irrKlang
CEGUIBase
CEGUIOgreRenderer
ws2_32
NatNetLibStatic
NPTrackingTools
wiiuse
opencv_core243
opencv_highgui243
opencv_imgproc243
OpenNI
XnVNITE
cryptlib
)

Stencil shadows in Ogre and Blender model exportation

If you are gonna use stencil shadows in Ogre, you should carefully read the manual page about this shadowing technique, and be sure to fully understand what is explained there. Besides, you can find some useful hints and tips regarding this topic that I have discovered while adding shadows to my scenes.

  1. Any object (mesh) casting shadows must contain an edge list, which can be generated either when exporting the mesh in Blender (or any other modelling tool) or calling Mesh::buildEdgeList before the mesh is used in run-time. If you are using Blender, make sure that the option Edge Lists is enabled when exporting your model (like I explained in a previous post).

    Edge Lists option when exporting.

    Edge Lists option when exporting.

  2. Current Ogre release (v1.8.1) has a bug when computing stencil shadows if a light source is placed inside an object. Read this thread. Solutions: a) do not place a light source inside an object (with edge list), b) apply the patch posted in the previous thread to your Ogre sources (this patch will be included in the next maintenance release), c) consider switching to the texture shadows technique.
  3. Stencil shadows project the object geometry. The shadow caster class (OgreShadowCaster) has a 16-bit index limit on the number of vertexes. This limit will only be shown to the user in debug mode with an assert. In release mode, this limit will not trigger anything, but shadows will not work properly. In addition, the performance may be seriously penalized, if big meshes are used with this technique due to the geometry projection. Therefore, if shadows do not work properly, make sure none of your meshes exceeds the 16-bit limit executing in debug mode. If this requirement is not meet, you can split the mesh in different pieces (that will help Ogre to cull non visible parts), or reduce the number of vertexes.

Most used (by me) Blender user interface controls and shortcuts

This are the Blender interface controls and shortcuts that, so far, I have been using the most. I will update this list as soon as I find useful shortcuts for my tasks. Please, you should refer to the official blender manual for details. Useful direct links:

Mouse legend:

  • LMB: left mouse button.
  • MMB: middle mouse button.
  • RMB: right mouse button.
  • MW: mouse wheel.
  • MM: mouse motion.

General

  • A: select/unselect all.
  • R: rotate. +X, +Y or +Z rotation on the respective axis. The rotation degrees may be typed and accepted with ENTER.
  • S: scale. +X, +Y or +Z scale on the respective axis. The scaling factor may be typed and accepted with ENTER.
  • G: translate.
  • CTRL+L: invert selection.

3D View > Edit mode

  • CTRL+E: edge menu.
  • U: unwrap menu.
  • ALT+M: merge vertices menu.

These controls depend on the active selection mode (vertices, edges or faces).

  • ALT+RMB: loop selection.
  • SHIFT+RMB: add/remove an element to the current selection.
  • CTRL+LMB+MM: selection based on the shape created with the mouse motion.

3D View > Object mode

  • MMB+MM: scene rotation.
  • SHIFT + MMB: pan scene.
  • MW: discrete zoom in/out.
  • CTRL+MMB+MM: continuous zoom in/out.
  • CTRL+A: apply transformations to the geometry.

UV/Image Editor

  • MMB+MM: pan image.
  • MW: discrete zoom in/out.
  • CTRL+MMB+MM: continuous zoom in/out.

Camera/Lights

  • RMB: Move camera/light.
  • ALT+A: Add light.
  • Trick: First click on the camera/light, then on the object holding SHIFT (the order is very important). Do a CTRL+T and select TrackTo Constraint.

Modelling the Earth with Blender and exporting to Ogre

If you don’t know anything about 3D modelling (like me) and you directly install and open Blender to play with, you will spend a lot of time with little or none profit. There are many websites with Blender online tutorials and videos. If you are using the graphic engine Ogre, I recommend to start reading this.

In this post, I will explain how to create a very simple model, export it to the Ogre format, and check it with an external tool. Prerequisites: you need Blender and its Ogre exporter addon installed.

Take  into account that a real time game engine needs to precompute as many things as possible. Therefore, surfaces are not suitable for using them in real time, and only meshes can be exported to Ogre. However, it is possible to work with surfaces, if the final result is converted to meshes prior to the exportation.

During the installation process, the exporter must be configured to work with some Ogre command-line tools, because the exporter will create an XML file (with a name ended in .mesh.xml) for each mesh with all its data (e.g. vertices and normals), and this XML mesh file must be compiled into a binary mesh file (with a file name extension .mesh) for run-time loading and usage.

I am a complete Blender noob, but I will try to clearly explain how to model the Earth and export the scene for using it with Ogre. These steps were obtained after applying reverse engineering to this Youtube video:

Watch the video and use the following instructions:

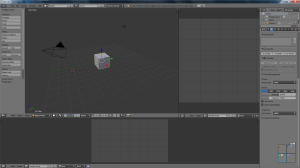
  1. Open Blender 2.65. Optional: at the upper area, click and drag at right bottom corner, so you can divide the upper client area into two halves. The right half may be switched to the UV/Image Editor with editor type switch at the bottom left. Note that with F12, it is possible to render the scene and see the final result in the right half. At the lower client area switch to the UV/Image Editor, too. We will use this are when editing the UV Map.

    Split screen.

    Split screen.

  2. Remove the cube at the left panel in Object Mode with the DEL.
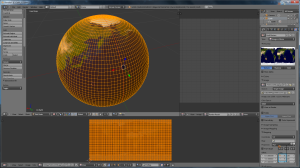
  3. Create the sphere. Go to the Add menu > Mesh > UV Sphere. A new sphere should appear where the Blender cursor is.
  4. Parametrize the sphere. At the left, a new section Add UV Sphere, below the Object Tools section, contains the settings to parametrize the object. In this case, I need a mesh with a high resolution for looking at it from a closer point of view, with the sun light showing the day and night cycle.
    In order to avoid jagged borders in the illumination set:

    • The number of segments to 128.
    • The number of rings to 64.
    • Size 0.5, because I want a diameter of 1.0.
    • Make sure that the position is (0.0, 0.0, 0.0).

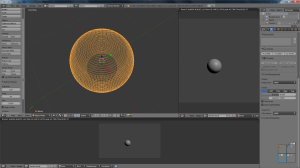
      Parametrized sphere.

      Parametrized sphere.

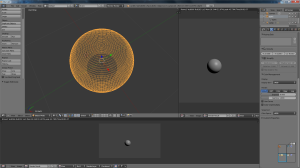
  5. Set the object name to Earth. Your scene should look similar to this one:

    Earth's sphere.

    Earth’s sphere.

  6. Add material. Go to the right tool box with the properties and click on the material tab:
    • Add a new material.
    • Change its name to EarthMaterial.
    • Now, switch to the texture tab.
    • Add a new texture.
    • Change its name to EarthTexture.
    • Change its type to Image or Movie.
    • Find the open button below and browse for the image texture.
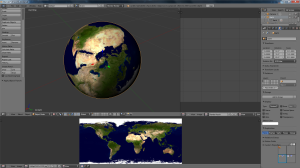
    • Scroll down to Mapping. Change the projection to UV and leave the projection as Flat. This means that we will create the UVMap manually. It is mandatory to create a UV map for explicitly tell to Ogre how the texture is mapped on the sphere surface.
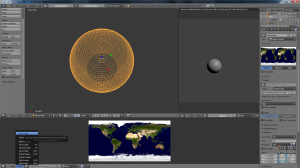
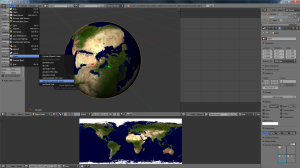
  7. The texture is associated to a given path. Therefore, if it is removed from the current location, the material will be broken. To avoid this situation, it is possible to pack the texture. Go to the lower client area and select the texture image instead of the render result. Click on the Image menu and select Pack Image. Save the scene in Blender format as a checkpoint.

    Packing texture.

    Packing texture.

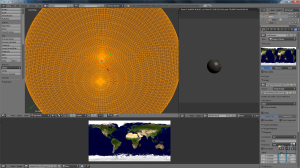
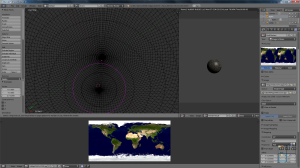
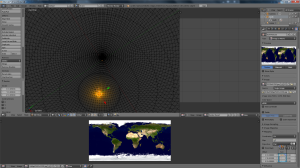
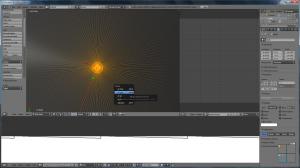
  8. Go to the 3D View, switch to Edit mode, and rotate Earth until one of the poles is clearly visible.

    Pole view.

    Pole view.

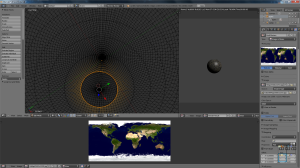
  9. Select at the Mesh Tools box from the right the Loop Cut and Slide tool. Cut between the last ring and its previous one.

    Loop cut.

    Loop cut.

  10. Slide the cut until you almost touch the last ring.

    Loop slide.

    Loop slide.

  11. Press ALT+RMB (right mouse button) on the old ring, not the new one we have just created using the Loop Cut and Slide tool, to select it.
  12. Press SHIFT+RMB on the pole vertex for adding it to the selection.
  13. Change the pivot point to the active selection, which should be the pole vertex.

    Change pivot element.

    Change pivot element.

  14. Press S, to scale the old ring and shrink it as much as possible.

    Scale old ring.

    Scale old ring.

  15. Repeat steps 8 through 14 for the opposite pole vertex.
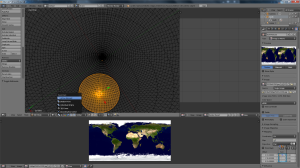
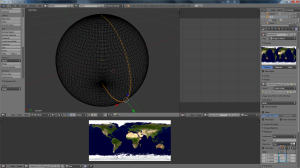
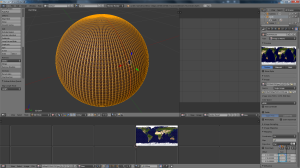
  16. Now, we are going to unwrap the sphere, and our first step is to define the seam used for cutting the object surface. Use again ALT+RMB on a segment to select it.

    Select a segment.

    Select a segment.

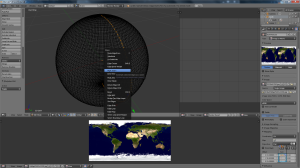
  17. Press CTRL+E and select Mark seam. Note that one everything is deselected, pressing A, the segment color has changed to red.

    Mark seam.

    Mark seam.

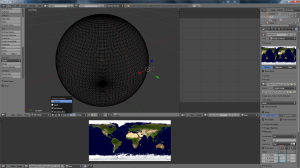
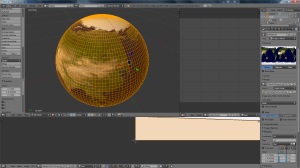
  18. Change viewport shading to texture mode.

    Change viewport shading to texture.

    Change viewport shading to texture.

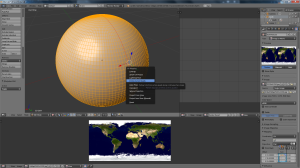
  19. Change to select faces, right click on a adjacent face to the seam. Press A to select all faces. Finally, press U to open the UV unwrap menu. Select Follow Active Quads.

    Unwrap following active quads.

    Unwrap following active quads.

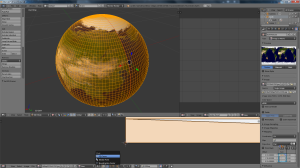
  20. Make sure that your texture image is visible in the lower area. Note that the cursor is at the left bottom corner. Don’t touch it, from now on, you are only allowed to use the MMB (middle mouse button) to pan 🙂 .

    Initial unwrapping.

    Initial unwrapping.

  21. Press A to select all the quads. In this particular case, we need to rotate the quads -90º. Press R, type -90 and press enter. Use only keys S and G to scale and translate the quads. If you want to scale only using the X or Y axis press S and then X or Y, respectively. Remember to use only the MMB to pan, and the mouse wheel to zoom, do not use the other mouse buttons.
  22. Match the left bottom corners of quad mesh and texture.

    Match left bottom corners.

    Match left bottom corners.

  23. Change the rotation and scaling pivot to 2D Cursor.

    Change pivot.

    Change pivot.

  24. Do the same for the right top corner, and the UV mapping will be almost complete.

    Completed UV mapping.

    Completed UV mapping.

  25. So far, we have mapped every sphere quad to the texture. However, do you remember the “old ring” that we shrink to the pole vertex? The ring and the pole vertex are joined with triangles, not quads. Therefore, these triangles were not included in the UV mapping and we should fix this. Rotate and translate the sphere to make the pole vertex visible. Make sure that vertex selection mode is on. Press CTRL+LMB and draw a circle for selecting the small ring surrounding the pole.
  26. Press SHIFT+RMB on the pole vertex for adding it to the selection.
  27. Press ALT+M to merge vertexes At Last. Make sure that every vertex of the ring is selected like in the following picture. You may need to scale the sphere and press CTRL+MMB moving the mouse in order to place as close as possible the pole vertex to the screen.

    Merge vertices.

    Merge vertices.

  28. We are almost there! Any transformation made to the object will not be exported, unless it is explicitly applied to the object, because it is not really part of it. This concept is very similar to the Ogre scene hierarchy. Every entity is assigned to a scene node. This scene node may have one or more nodes in its path to the root node of the scene tree. The transformations of each node in this path define the eventual transformation of the leaf node. Therefore, an entity and its transformations (translation, orientation and scaling) are decoupled. In Blender, this is identical. The entity is our mesh, and the eventual transformations are our Blender transformations. In short, you must always apply the transformations made to the object before you export it, or they will be lost.
    I placed my seam at the segment that crosses the Y axis. The reason is that I want to rotate -90º degreees using the X axis and make the Z axis cross near Africa and Europe, because Ogre uses a different orientation an the Y axis defines the up vector, instead of the Z axis used in Blender. Press R+X, type -90 and ENTER.
    Switch to the Object mode. Press CTRL+A and apply location, rotation and scale, if needed.

    Final rotation.

    Final rotation.

  29. We are now ready to export. Go to File > Export > Ogre 3D.

    Ogre export.

    Ogre export.

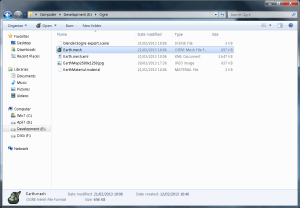
  30. The generated files should be something similar to this.

    Generated files.

    Generated files.

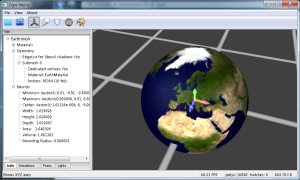
  31. The Earth.mesh file can be checked with Ogre Meshy.

    Ogre Meshy view.

    Ogre Meshy view.

Note: Alternatively, you might also try using a PolySphere, since the spherical surface division into quads is much more regular. However, the unwrapping for building the UV mapping may be more complicated. PolySphere is included with the Extra Object Addon. It looks spheric without the subsurf and smooth shading.

You can enable the Addon via:
File > User Preferences > Addons > Add Mesh > Add Mesh: Extra Objects.

And then add a PolySphere via:
View 3D > Add > Mesh > Extra Objects > PolySphere.

Installing Blender and Ogre scene and mesh exporter under Windows 7

If you are working with Ogre, you will need to model and export objects to build your scene. The following instructions will help you to install and configure Blender and the Ogre scene and mesh exporter (but don’t forget to read the official threads and readme files):

  1. Download the latest version of the Ogre scene and mesh exporter from the official Ogre forum thread. Unzip it and read carefully the documentation included.
  2. Download and install the exporter supported version of Blender.
  3. Find the Python version that Blender is using. Download it from the official page and install it.
  4. Add Python installation folder to the system variable PATH. Add a user or system variable named PYTHON pointing to the Python executable.
  5. Download and install the Ogre Command-line Tools. You may want to update OgreMeshUpgrader.exe and OgreXMLConverter.exe with the versions compiled from the latest Ogre sources. In this case, move the installed OgreMeshMagick.exe and OgreMain.dll to a sub or separate folder. Replace the mesh upgrader and XML converter executables and the OgreMain.dll with the ones you have compiled, as explained in another post. Add any created folder to the system variable PATH.
  6. Open Blender and go to File -> User Preferences. Click on Addons tab. At the bottom of the floating window, click on the “Install from file…” button and select the io_export_ogreDotScene.py script.
  7. Make sure that the check box at the right edge of the newly created addon is selected in order to activate it. Click on “Save it as default” for loading the addon each time Blender starts.
  8. Restart Blender and check that two new export formats have appear at File -> Export: Ogre3D and realXtend Tundra.
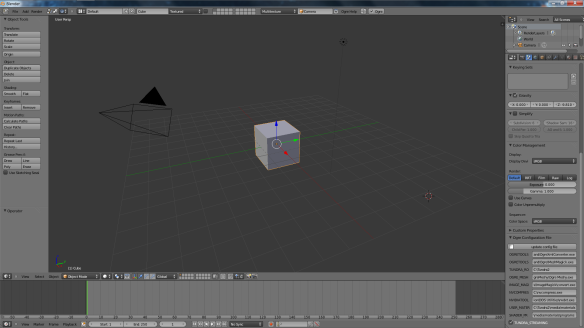
  9. Configure Ogre exporter options in Blender. Look for an “Ogre” checkbox at the end of the Blender menus (near “Ogre Help”), whose tooltip says “toggle Ogre UI”. Check it. Then, go to the tool box at the right, scene properties, and a new section “Ogre Configuration File” should have been appeared at the bottom. Make sure that, at least, the OGRETOOLS paths are pointing to the Ogre command-line executables.

    Ogre Exporter Options

    Ogre Exporter Options in Blender

  10. Download and install Ogre Meshy for being able to easily load, inspect and check your exported models. Add the executable path to the “Ogre Configuration File” section of the exporter.
  11. Download and install ImageMagick binaries for dealing with texture image conversions. Add the executable path to the “Ogre Configuration File”.
  12. Optional steps:
    If you need support for DDS texture files or realXtend Tundra, check the exporter readme file to download and install the utilities to support those formats.

The final step is to export the scene that Blender shows by default with a cube, a camera and a light, and check with Ogre Meshy that everything is properly exported.

CMake and the executable stack size in Visual Studio

Today I have been struggling with my first mystical error at my new job. The C++ project was able to compile and execute. At least, the screen was showing the 3D initial menu. However, when I tried to open any of the sub-applications where big 3D models where used, strange exceptions were thrown, such as out of memory when loading a texture, vertex buffer can not be allocated, and similar ones depending on the sub-application executed.

I have been porting the project from a manually maintained .sln file to CMake. So, the first step was to make sure that the original executable was working, and it was. Then, I compared the compilation and linking flags in the both project files, and I removed the new flags, which were not present in the original solution, one by one. Finally, I discovered (after 5 hours) that CMake (version 2.8.10) adds to the linker flags /STACK:10000000, which means that the heap size is initialized to 10MB, instead of the default 1MB. Adding the following lines to the main CMake file:
STRING(REGEX REPLACE “/STACK:[0-9]+[ ]” “” CMAKE_EXE_LINKER_FLAGS “${CMAKE_EXE_LINKER_FLAGS}”)
SET(CMAKE_EXE_LINKER_FLAGS “${CMAKE_EXE_LINKER_FLAGS}”
CACHE STRING “Flags used by the linker.”
FORCE
)

solved the problem. Note that a similar problem may occur if there are multiple threads in the application, since the total amount of memory used will be num_threads by stack_size.

Note that this flag must be also removed from all your project dependencies that use CMake for generating project files. Then, the modified dependencies must be rebuild and finally your project, too.